Is van insulation worth it? What van insulation should I use? What even is van insulation? And how do you insulate a van?
Perhaps the one part of any van build, skoolie build or RV renovation that has the most significant impact on your comfort is insulation. Van insulation affects how cool your van stays in the summer and how warm you are in the winter. Plus, insulation can even help with sound deadening your van so that every little sound outside isn’t keeping you up at night.
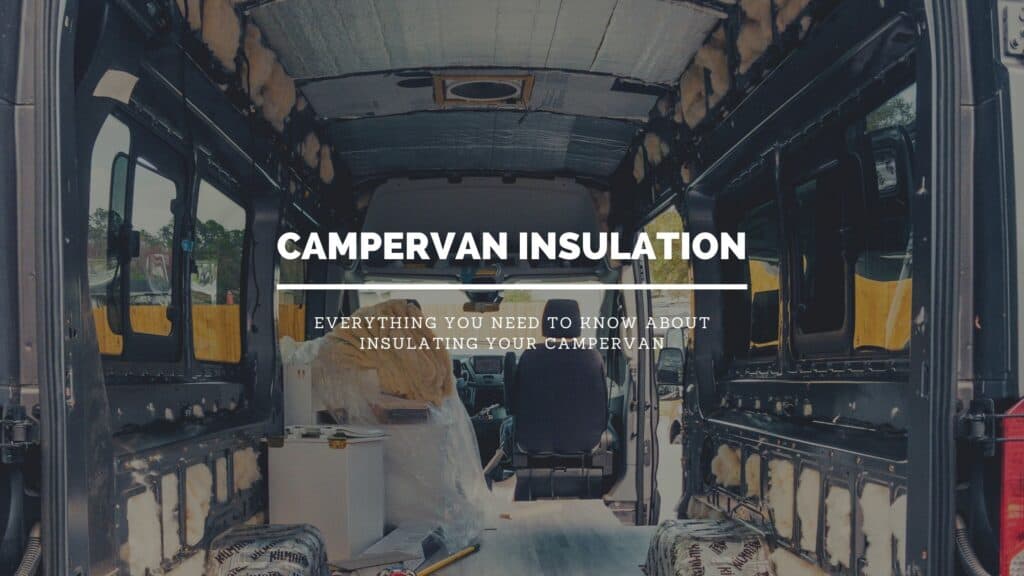
Van insulation is anything used to fill the cavities in the walls of a van or bus to help create a heat barrier. The heat barrier that insulation materials make helps keep heat out in summer and in during the winter. There are many different ways to insulate a van, and we’ll be covering just a few of the most popular methods for providing the best insulation for your campervan.
Why You Should Insulate Your Van
- Temperature Management: Keeping cool and staying warm while traveling in your campervan is something that can have a significant impact on the enjoyment of your travels. What good is getting to travel to a ski town in winter if you are constantly freezing inside your own home. Inversely when the summer heat starts to hit, having a cool place to relax and sleep is a pretty big thing.
- Moisture Management: No matter the heat source you use in your van, condensation is something you will have to deal with during the winter. Moisture is constantly being introduced into the air of your campervan from cooking and breathing. When that moisture interacts with the cold metal the van is built with, it will condense into water. Having proper insulation that prevents the cold metal of the van from interacting with the air will help with moisture management and avoid mold or mildew.
- Sound Deadening: An additional bonus to insulating your campervan is that the insulation will help with sound deadening. Having good sound deadening in your campervan will help prevent sounds from constantly waking you up at night, plus make for a quieter ride when driving down the road.
- Pets: Suppose you are traveling with a furry companion. In that case, having your campervan insulated will help give you some peace of mind when you need to leave them in the van to run into a store or to check into a campground.
- Overall Personal Comfort: From moisture and temperature control to having a quieter ride, there are many benefits to insulating your camper van that will lead to a generally higher level of comfort while traveling.
Campervan Insulation Terms
- R-Value: The capacity of an insulating material to resist heat flow. The higher the R-value, the greater the insulating power. R-Value is talked about as per inch of insulating material. For example, something could have an R-Value of 7, so for each inch of thickness of that insulating material, the R-Value would increase by 7.
- Thermal Bridge: A thermal bridge is a concept of thermodynamics that can be a bit complex to learn about at first. Instead of diving into thermodynamics, all you need to know to insulate your campervan is this. A thermal bridge is a path that either heat or cold can travel along to effectively bypass your insulation. Thermal bridging is something we want to avoid.
- Off Gasing: By now, most people will probably know about off-gassing but just in case. Off-gassing is when something manufactured with VOCs or volatile organic chemicals gives off a chemical, especially a harmful one, in the form of a gas. Often, we experience off-gassing when we unpackage something, and it has that chemical smell to it that needs to air out.
- Radiant barrier: A radiant barrier does not provide much direct insulation as all it does is reflect heat. Radiant barriers are great for insulating windows and not much else.
Best Campervan Insulation Methods
You now know why it is essential to insulate your campervan, along with knowing some of the terms used when talking about insulating, but what kind of insulation should you use? When we started our van build, we spent hours reading all about the different types of insulation that people use. The pros and cons of each kind of insulation and how to install it. All while trying to learn what would work best for us and our van.
Hopefully, this post will help save you hours of research by putting everything we learned into one location that you can reference back to while figuring out what type of insulation will work best for you.
Sheep Wool Insulation
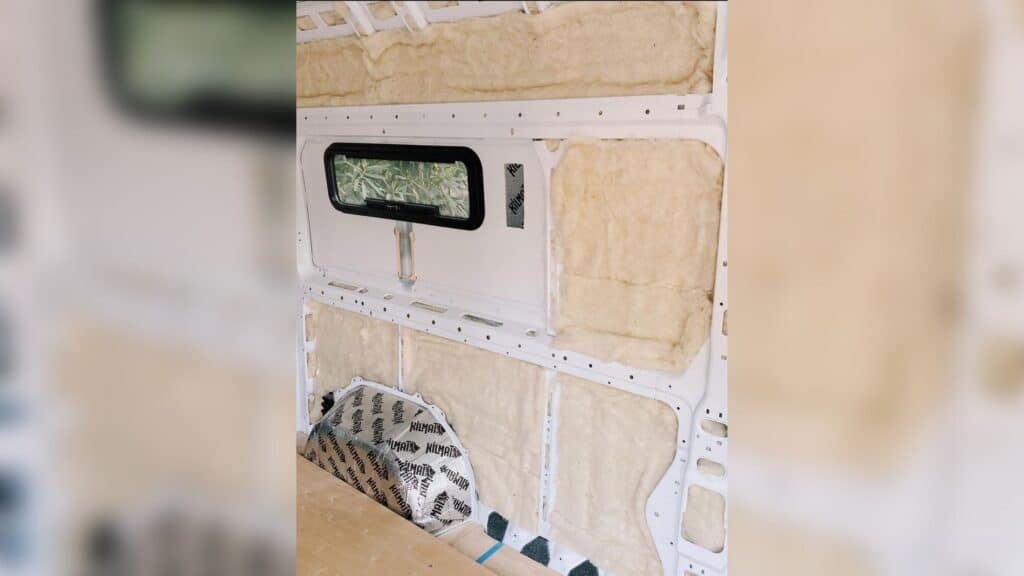
R-Value: 3.6 per inch
Where to Buy: Havelock Wool
Havelock Wool is an incredibly popular method of van insulation. Amiana and Gwyneth of biggayadvanture said, “Havelock was super easy to install. We used 3M high strength spray adhesive to adhere the wool to the van walls which worked like a charm. In total, it took maybe 5-6 hours to install all of the insulation. It was probably the easiest part of the van build.” and that they “LOVE the Havelock. We would use it again in a heartbeat, and would absolutely recommend it.”
While an R-Value of 3.6 does not sound very high when you start layering three, four inches into the walls of a campervan, the R=Value adds up. Plus, wool is more straightforward to fit into tight spaces than other types of insulation.
In our opinion, Havelock wool is by far the best way to insulate a campervan. It is what we used for insulating the walls of our Ford Transit van, and we highly recommend it.
Pros To Havelock Wool:
- Easy To Install: Havelock Wool is just sheep’s wool. Unlike other types of batting insulation, such as fiberglass, you do not need any special protection. You just grab a batt of insulation and shove it into a cavity, and you’re done. For the smaller spaces in a van that a full batt won’t fit, you can just tear some wool off a larger piece and fill all those little nooks and crannies.
- Moisture Control: Havelock Wool is the only insulation we know of that can actively manage moisture in your campervan. Wool can absorb moisture when the walls of your van condensate, preventing that moisture from causing rust, mold, or mildew. Then when the air in the van dries out, the wool will safely release the captured moisture. Think about your hair when you take a shower. It absorbs the moisture and then slowly releases it without mold or mildew.
- Sound Deadening: Havelock Wool works both for insulation and for sound deadening. All those pressed-together strands of wool basically act as a sponge for sound, making for a quieter ride.
- Non-Toxic: Havelock Wool does not use any glues or binders. The batts are held together by compressing the wool together. Plus, wool is a 100% natural form of insulation with no off-gassing chemicals used in production.
- Sustainable: Sheep’s wool is the only 100% sustainable insulation on this list. Once the sheep are sheered, they grow a new coat, and more vans can be insulated.
Cons To Havelock Wool:
- Time: Depending on the type of van you have, Havelock can take over a day to fully install. It took us about 12 hours split across a few days, to fully insulate our campervan. Most of that time was slowly shoving bits of wool into hard-to-reach places.
Tips For Havelock Wool:
- Use a long thin wooden dowel or kabob skewer to help push wool into small gaps and channels
Polyiso Rigid Foam Board Insulation
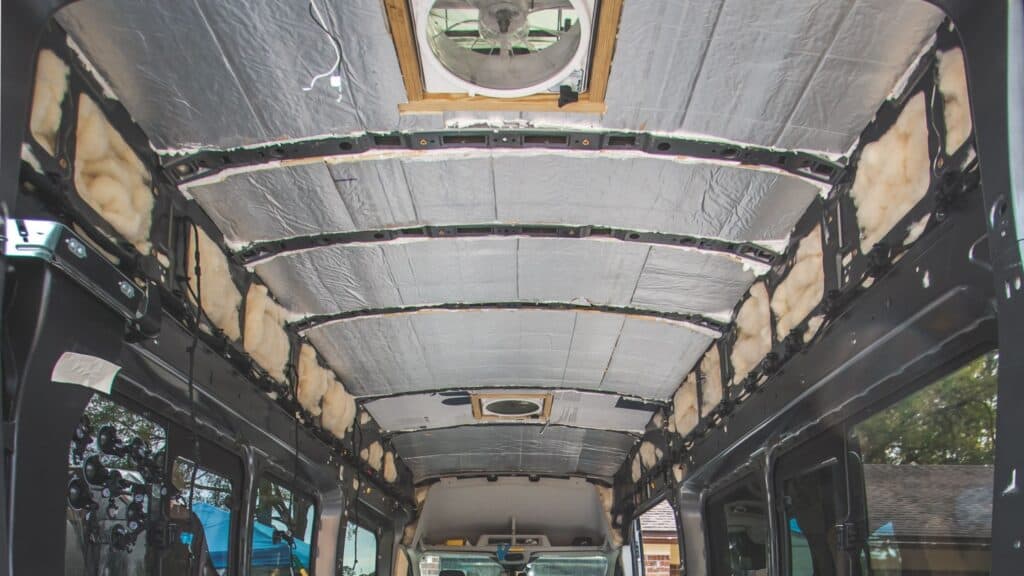
R-Value: 6.0 per inch of thickness
Where to Buy: Home Depot
Polyiso rigid foam board insulation is an excellent alternative to wool insulation in certain situations. We used rigid foam board for our floor and ceiling insulation as rigid foam board works best in large flat areas without any obstructions. It can be challenging to fit a rigid board into a tight cavity. The most significant benefit of using rigid foam board for the floor and ceiling is the increased R-Value over wool insulation.
Pros To Rigid Foam Board Insulation:
- Easy To Get Started: You can buy rigid foam board insulation at any of the big home improvement stores. Meaning no waiting for your insulation to arrive by mail and no dealing with backorders to get started.
- Comes In Multiple Thicknesses: You can get rigid foam board insulation in varying thicknesses providing more flexibility for insulating your campervan. Thinner foam boards can even be bent a bit without them breaking if you are dealing with curves.
- Higher R-Value For Floor And Ceiling: We like using rigid foam board for our floor and ceiling to have a bit of extra R-Value.
Cons to Rigid Foam Board Insulation:
- Can Be Messy: Cutting rigid foam board insulation can get messy. The styrofoam often crumbles when being cut, leading to a big mess if you are not extra careful.
- Can’t Fit Into Tight Spaces: With rigid foam board, it can be challenging to fully insulate cavities in a campervan’s walls.
- Have To Seal Gaps With Extra Insulation: Having gaps is something that can not be avoided when working with rigid foam board insulation. To prevent air gaps that can act as a thermal bridge, you need to go back over each area and fill in any gaps with something. We used a spray can foam to fill the gaps in our ceiling insulation.
Tips For Rigid Foam Board Insulation:
- Make sure the glue you use is rated for foam board. Some glues will melt foam board insulation
- If your roof has a slight curve to it as ours does, we recommend getting 1/2″ foam board so that the insulation can bend with the curve of your roof.
Spray Foam Insulation
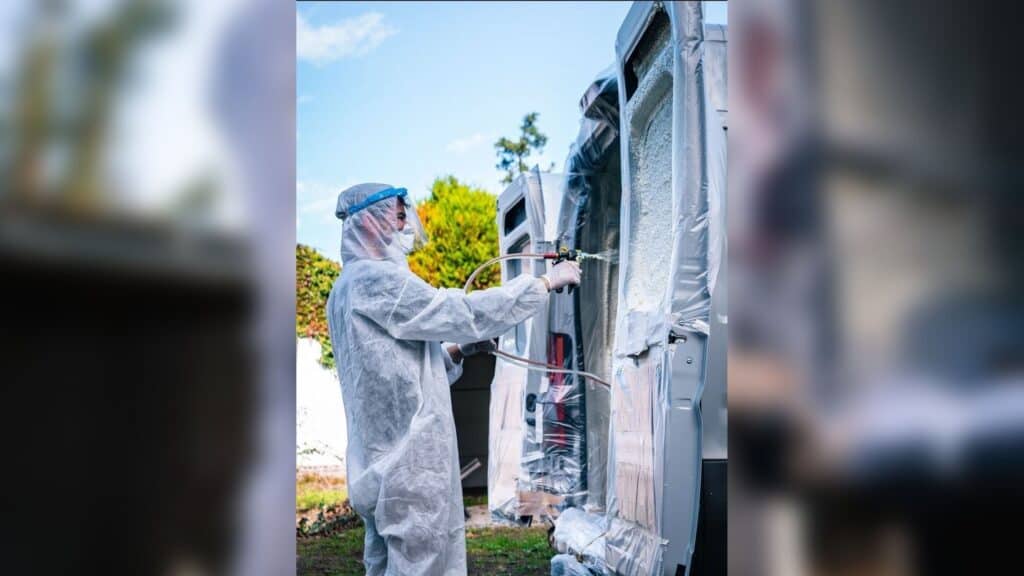
R-Value: 6.2 per inch of thickness
Where To Buy: Home Depot
Spray foam is another popular method of van insulation as it can provide a high R-Value and help with sound deadening. Stef & Bo, who are converting a Fiat Ducato in Belgium, decided to use spray foam insulation for their van. Saying that for “all climate conditions we want to visit,” spray foam would work the best.
Pros To Using Spray Foam Insulation
- High R-Value: With an R-Value of 6.2 per inch, spray foam can be a great way to insulate a campervan
- Moisture Control: Spray foam seals along the walls of your van, acting as a vapor barrier. As long as you get an even coating without air bubbles that could trap moisture, the spray foam will prevent any condensation from forming in your walls.
- Spraying Can Be Done Quickly: Stef & Bo said, “The spraying process [it]self was probably done in +-1 hour”.
Cons To Using Spray Foam Insulation
- Lots Of Prep: While the actual spraying does not take much time, there is much prep work with spray foam insulation. You’ll need to tape off any areas you do not want spray foam to go to; this includes your floor. Stef & Bo said, “the spraying was not hard to do, just don’t rush it. Preparation is a very important step”. Make sure to check out their YouTube channel to see what all prep is needed with spray foam and watch the entire process.
- High Cost: Spray foam insulation is probably the most costly way to insulate a camper van. Each kit costs around $370. Most vans will need 3-4 kits to fully insulate.
- Off-gasses: Spray foam insulation uses two chemical parts mixed together to create the foam insulation. This process often leads to off-gassing that could last for a couple days once the spray foam has set. If you are sensitive to off-gassing, then another type of insulation may work best for you.
- May Warp Panels If Installed Incorrectly: Spray foam expands. If you overfill tight spots in a van when the foam sets, it may be pushing on the outside panels, causing buckling. It is easy to avoid this from happening. Just make sure the spray foam has an open area to expand into so that pressure does not build.
Tips For Spray Foam Insulation
- Spray foam insulation kits come with a couple different nozzles for different application types. Make sure to learn when to use each type of nozzle to get the most out of your spray foam. If you really want to maybe even build shapes with scrap wood to practice how each nozzle reacts.
3M Thinsulate
R-Value: 3.3 per inch
Where to Buy: Amazon
Thinsulate is a synthetic insulation that 3M makes. Thinsulate has some of the same qualities that Havelock Wool has, such as being able to tear off small pieces to stuff into tight spots in your campervan.
Pros To Using Thinsulate
- Sound Deadening: Much like Havelock Wool, 3M Thinsulate helps with sound deadening.
- Decent Insulation: Thinsulate works as excellent insulation. However, suppose you plan to be in below-freezing temperatures. In that case, most people recommend combining Thinsulate with another insulation material for maximum comfort.
- Moisture Control: Like with wool insulation, Thinsulate is water resistant, helping to prevent rust, mold, and mildew.
Cons To Using Thinsulate
- Cost: At $100 for a 10-foot roll, costs can add up very quickly. Especially when considering most vans will need somewhere between five and seven rolls to be fully insulated.
Tips For Thinsulate:
- Most people use spray adhesive such as 3M 90 to secure Thinsulate to the vans walls.
Rockwool
R-Value: 3.3 per inch
Rockwool is an insulation material that is made of spun basalt rock and recycled slag. The rock and slag are spun into fibers that resemble wool and are pressed together into batts. We have seen a few vans that have used Rockwool, and we highly advise against it.
Rockwool is made entirely of fibrous rocks and slag, a byproduct of smelting steel and copper. This material is prone to become airborne when it is handled. It is recommended to wear a mask and goggles when working with Rockwool as the dust can have dangerous health effects. The EPA has listed wools made of minerals such as Rockwool to be a probable human carcinogen.
Cons To Using Rockwool
- Health Risks
- Have to wear a mask and goggles when working with Rockwool
Reflectix

R-Value: 3.7 – 21 depending on how it is used.
Where To Buy: Amazon
Reflectix is an excellent material for van insulation when it is used correctly. Reflectix is a radiant heat barrier and not insulation used in a van’s walls, floor, or ceiling. With Reflectix being a radiant barrier, it excels at providing insulation in the windows of your campervan.
Pros To Using Reflextix
- Reflects Heat Away: Reflectix essentially reflects the sunlight before entering your campervan preventing heat buildup inside. If you cover or paint Reflectix, it will still help but will not be as efficient at reflecting heat. When Reflectix is used inside a wall, it cannot be efficient insulation and provides very little insulation.
- Makes Excellent Window Covers: We made window covers out of Reflectix for all of our windows in our van conversion. We experience a massive temperature difference in the summertime when our Reflectix window covers are in vs. when they are not. Vans let a lot of heat in through windshields and side windows, so being able to stop that heat from entering our campervan is essential to staying cool.
Cons To Using Reflextix
- Can Only Be Used For Windows: Reflectix is a radiant heat barrier and not an insulator, meaning it should only be used for making window covers.
Tips For Using Relextix
- Reflectix can be cut with scissors.
- To help make your window covers last longer, use aluminum tape on the edges of the Reflectix to create a finished edge that can’t rip.
What We Used For Our Van Insulation
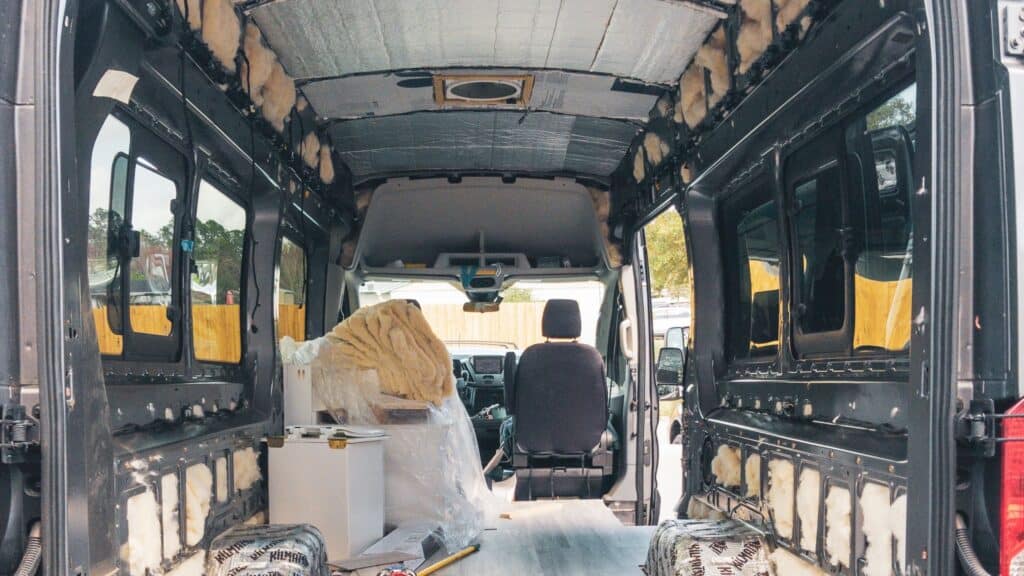
We ended up using two methods of insulation in our campervan, rigid foam board insulation in our ceiling and floors, to take advantage of the extra R-Value. Our ceiling has 2 inches of insulation for an R-Value of 12, and our floor has 1.5 inches of insulation. Everywhere else in the van, we used Havelock wool.
We wanted to use wool insulation in our van conversion because:
- Wool is easy to work with
- It is non-toxic and does not off-gas
- Wool helps with sound deadening
- Wool is a sustainable form of insulation
- Helps with moisture control
We have found wool insulation to work exceptionally well, even when the temps drop to near freezing, inside our van stays warm and comfortable.
Plus, sheep’s wool insulation does not cost as much as other types of van insulation. Amiana and Gwyneth said, “I think we got three “small” bags of Havelock R7 wool batts, which cost us about $450″ for their ProMaster conversion.
In our conversion, we used a total of 4 bags costing us $600 to insulate our extended length high roof Ford Transit.
Instaling Wool Insulation In A Campervan
Installing wool insulation in your campervan is a pretty straightforward process. You take batts and rip them down to size for most of the van before stuffing the wool into small and medium cavities. For the ribs and various channels, you tear the wool into little puffs.
There are also a few huge cavities in the walls of a van, plus the entire ceiling where wool can not hold itself in place. For those areas, the two most popular methods of securing wool are.
- String Method: Take a string and weave it back and forth across the larger cavities using all the small anchor holes already in the van’s wall. Then shove as many full-sized batts behind the string as needed.
- Spray Adhesive Method: Spray the back of the wool batt with a spray adhesive such as 3M 90 and then simply press the batt to the wall of the van, holding for a few seconds for the glue to grab hold.
The longest part of installing wool insulation in our Transit campervan was filling the ribs and small channels with wool. There is really no good way to fill the ribs and channels, so we recommend grabbing a long thin screwdriver or a kabob skewer to help shove the wool into openings and putting on your favorite podcast or music and go at it.
Total, it took us 10-12 hours to fully insulate our van, but we did go a bit crazy, making sure we filled every channel, rib, nook, and cranny with insulation before being done. Depending on how intensive you choose to be, wool can take just an hour or two to install, up to a few days.
Van Insulation For Windows
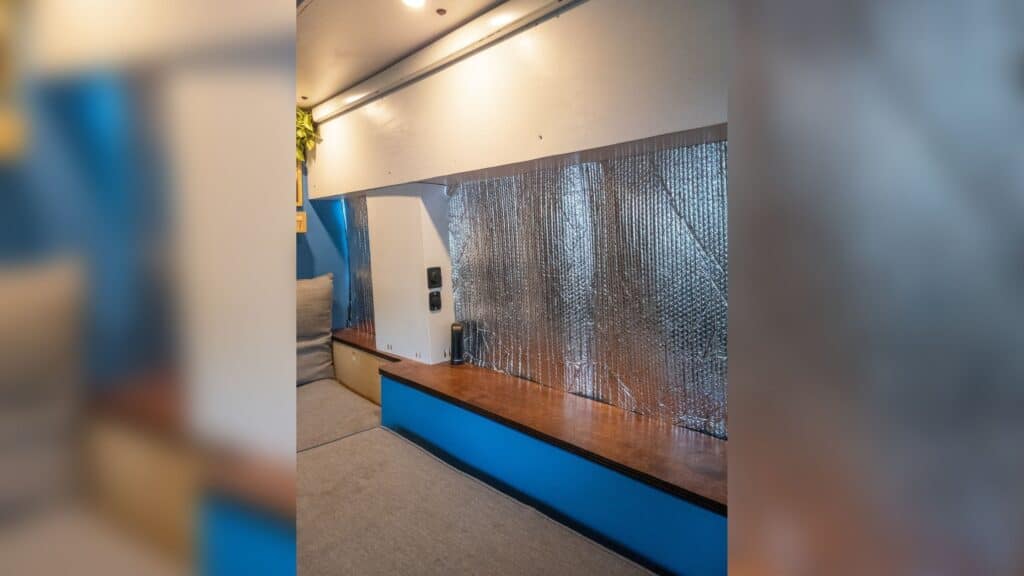
Wall insulation is not the only type of insulation that you need to think about. Windows let both heat and cold into the van, making it essential to have good window inserts if you plan to be anywhere slightly warm or cold.
Window inserts are perhaps the easiest part of insulating a van. We recommend using Reflectix for making your window insulation. Luckily Relectix can be easily cut with just a pair of scissors, and you can make basic inserts in just a few steps.
For square or rectangular windows:
- Measure the window you are making the insert for.
- Mark out your measurements onto the reflectix. We recommend using something that weighs the reflectix down as it tends to curl up on you.
- Cut out the marked shape and test fit into the window. If it does not fit, then make slight adjustments and test fit again.
For windows with curves
Some windows are curved, such as the driver’s and passenger’s windows.
- Use scrap cardboard or paper, whatever you have laying around, and tape or hold it up to your window. Try to mark where the window is and cut down your template.
- Once cut down, test fit your template and keep making adjustments until your template fits the window the way you would like.
- Transfer your template over to the Reflectix and trace the pattern
- Cut out the reflectix and test fit to see if it fits.
To help give a more finished look, we use aluminum tape on the edges of the Reflectix to finish the inserts off. You can also use fabric and spray adhesive on the inside of the Reflectix to give a professional finish.
Going Beyond Insulation

Having good insulation is only one half of staying comfortable in your campervan: having good ventilation is the other half. Ventilation helps with moisture and temperature control inside a campervan. In winter, having a roof fan that can draw humid air out of your campervan will help with controlling condensation.
During the summer, a rooftop fan helps keep air moving, so temperatures do not rise inside. Even with good van insulation adding a campervan awning can help provide a cool space outside to relax.
Plus, when cooking or running a propane heater inside a campervan, it is a good idea to have a rooftop fan to provide adequate ventilation.
In our campervan, we installed two Maxxair fans; we can set one to blow in while the other is sucking out, creating strong air circulation inside that really helps year-round.
We Want To Hear From You!
Are you planning on building out a campervan or already have? What kinds of insulation did you use or want to use? Or do you still have a van insulation question that we didn’t answer? Let us know in the comments down below. We’d love to hear what others are doing for their van insulation.
