Campervan ovens. Some people find them a must for their builds, while others choose not to have an oven in their campervan to save space. In our experience, we love having an oven in our campervan and find it a must as we enjoy being able to make homemade pizza and cookies wherever we may be camping.
Luckily, having a campervan oven doesn’t mean you need to set aside a large chunk of your kitchen where an oven would go. There are ways to bake right on your stovetop, and there are even portable campervan ovens that you can use outside.
Cast Iron (Skillet Or Dutch Oven)

Cast iron, you can cook with it, and you can bake with it. Cast iron pans are among the most versatile items you can have in your kitchen. Did you know you can even use a cast iron pan on a stovetop as a small oven? Whether baking cookies, a casserole, or even baking a pizza, you can use your cast iron pan right on your stovetop burner and get great results.
The secret to using a cast iron pan as a campervan oven is to heat the pan up on your stovetop for 10 to 20 minutes to ensure the pan is entirely at temperature. Then throw in your pizza dough and topping and cover with a lid. It may take a few tries to get used to baking on a stovetop in a pan, so don’t be discouraged if the first attempt is not so great.
The best part is that cast iron pans work on every type of stovetop, including induction tops. Not only will a cast iron pan work with whatever stovetop you have but a cast iron pan does not take up anywhere near as much space as a larger campervan oven. If you would rather avoid using propane in your campervan or bus conversion, using a cast iron pan as a campervan oven might be perfect.
GO SUN Fusion Solar Campervan Oven
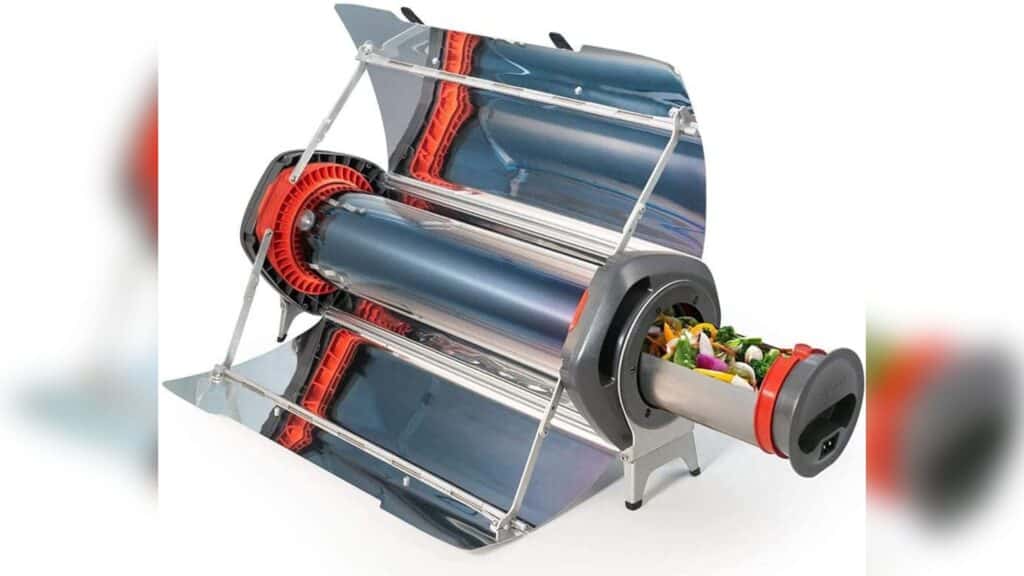
If you are looking for a campervan oven that is a bit more capable than baking in a pan but not interested in having to have propane in your campervan? A solar cooker might be a good fit for your needs. Solar ovens such as the GO SSUN Fusion do not need any propane or power to work. You just set them up in direct sunlight, and the built-in mirrors redirect the sunlight to a baking chamber.
The focused sunlight can heat the baking chamber to around 550°F so that you can bake anything that you would be able to bake in a standard oven. The GO SUN Fusion is one of the larger portable solar ovens on the market, making five servings at a time.
The part we find pretty cool about the GO SUN Fusion solar oven is that you can also plug the oven into a 12v power source. So if it is dark out, it is a rainy day, or you do not feel like cooking outside, you are still able to able to use the oven.
Dometic RV 3 Burner Campervan Oven
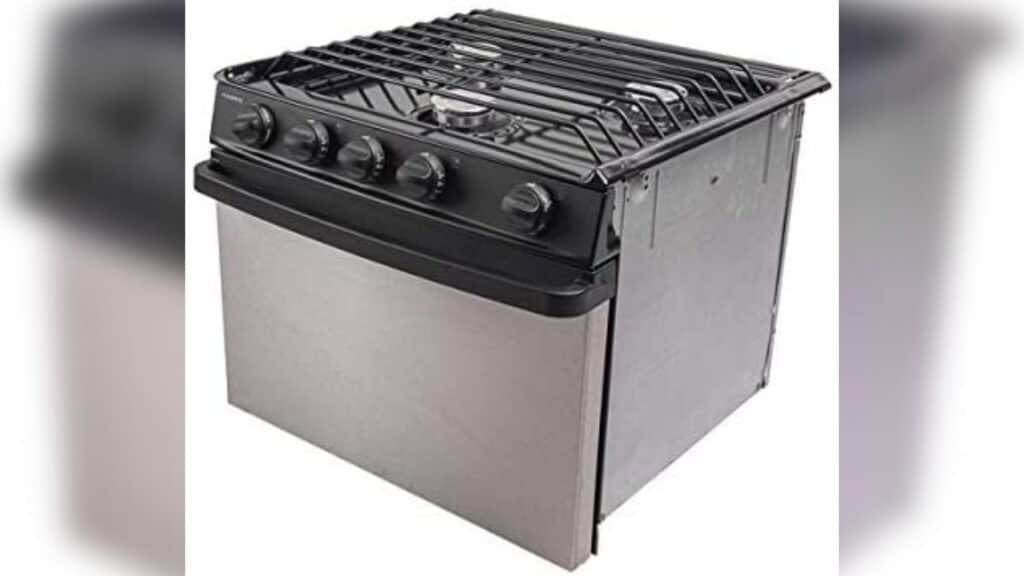
Dometic is a well-known and trusted name in the RV industry. If you plan to have propane appliances in your campervan, then an RV 3 burner range might be an excellent campervan oven for you. Propane RV ranges typically have two oven sizes available that you can choose from. The only difference between a larger RV oven size and a smaller one is the height of the oven.
We recommend you follow the same safety tips for installing an RV oven as we give later in this post about installing a Camp Chef oven. A propane detector and proper heat mitigation are necessary whenever working with an installed propane oven.
Camp Chef Portable Campervan Oven – Our Pick
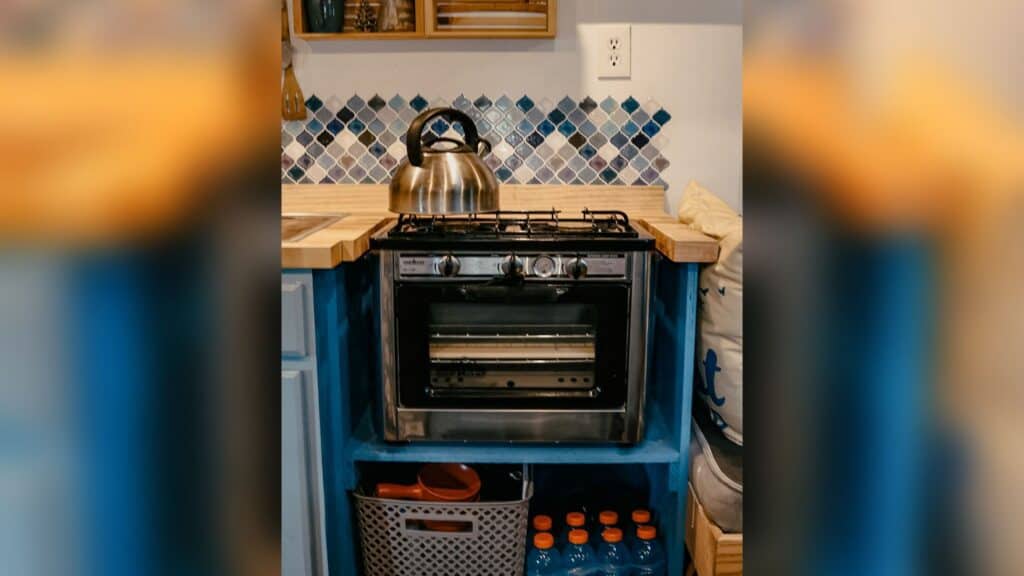
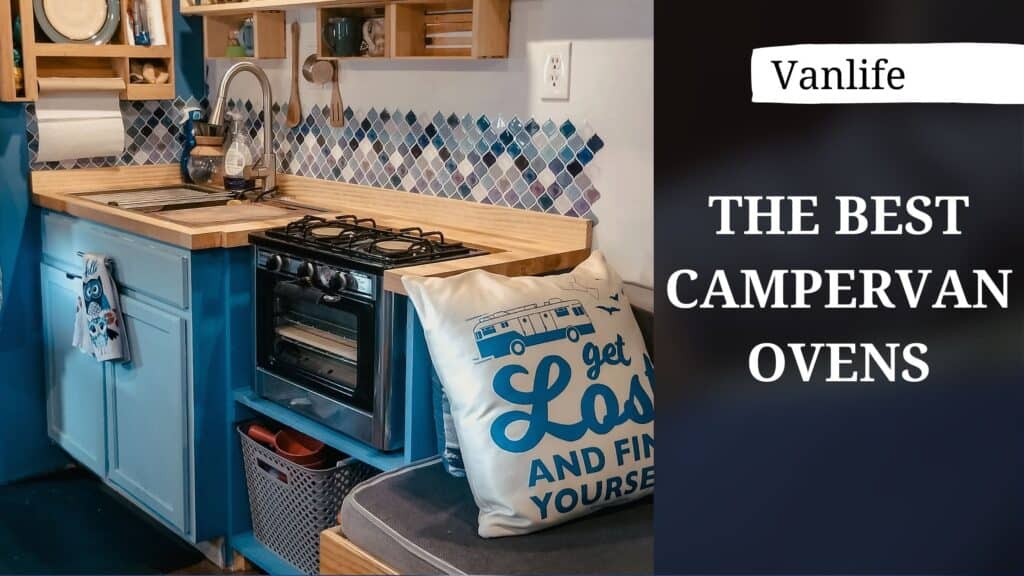
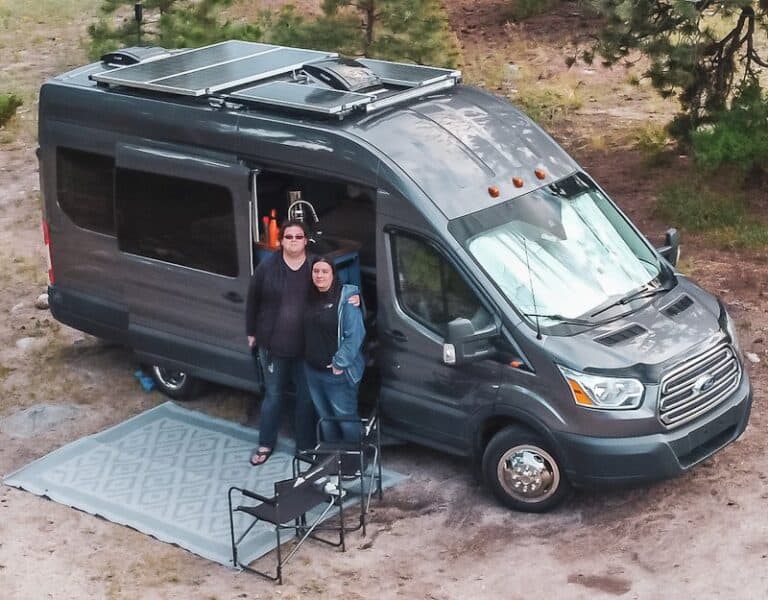
We have used the camp chef portable oven in two of our builds. The first time was in our 1971 Blue Bird bus conversion. We loved the camp chef so much that we now use it in our 2015 Ford Transit campervan. Why do we love the camp chef portable oven so much? We find it to be the perfect sized oven, and with its two burners on top, it meets all of our needs for cooking.
The Camp Chef portable oven uses a single 1lb portable bottle of propane that attaches to the rear of the range. Using disposable 1lb propane bottles is excellent if you do not want to have the hassle of running propane lines through your van or bus conversion. If you do not mind having a larger propane tank on board and having to run propane lines, you can easily attach a propane line to the oven instead of using a 1lb bottle.
We did not want to deal with running propane lines in our bus conversion, so we used a disposable 1lb bottle. Each bottle would last about five days of cooking all our meals with either the oven or the stovetop burner. Our current 2015 Ford Transit van has our Camp Chef oven attached to a 10lb refillable bottle. The 10lb bottle lasts us about two months between fill-ups and only costs $10 to have refilled at a hardware store.
Why We Went With A Camp Chef Oven
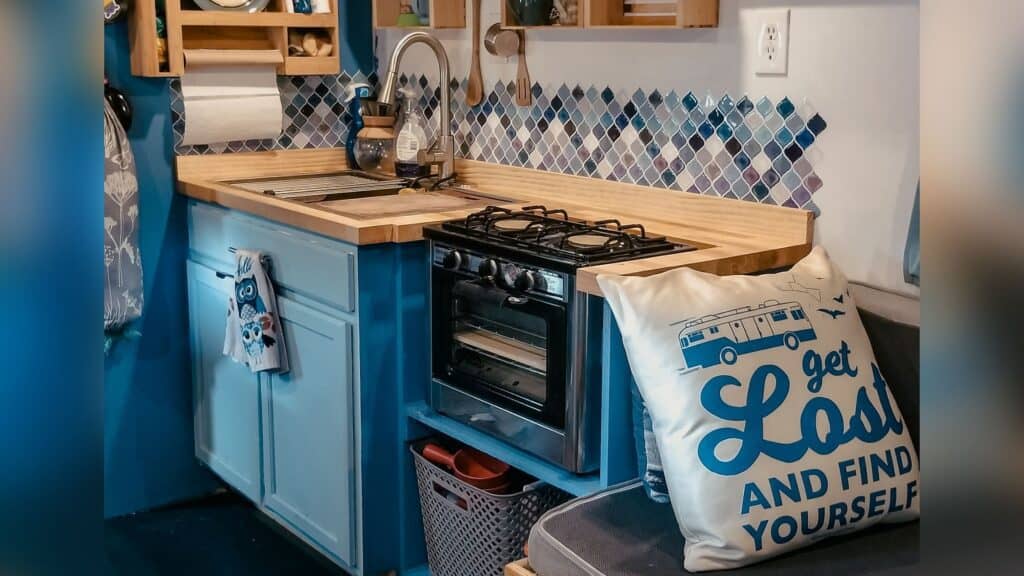
Not only does the Camp Chef oven have great flexibility with being able to use either a 1lb or larger sized bottle of propane, but most importantly, we find it just works. We have zero complaints about either the two-burner stovetop or the oven. The stovetop burners have auto ignition, so there’s no need to use a lighter or a match to light the stove. The oven also has the same auto spark ignition.
While neither the stovetop nor the oven has excellent temperature control, with really only having a low and high setting, we have never found that an issue. Nothing we cook or bake needs a more medium setting, and if it is necessary, there is enough control in the knobs if you turn them slowly.
One of the main reasons we love the Camp Chef oven and have used it in both our bus conversion and our van build is because it is so much cheaper than other options out there. It is a good deal at $325 for a full-feature two-burner stove with a built-in oven large enough to bake a pizza. If you can wait until a sale, it is possible to get a Camp Chef oven for around the $150 range. Making it the cheapest oven and stovetop combo you can get for your campervan or bus conversion.
The main thing to consider about using a Camp Chef oven in your campervan is that the stove was initially designed only for outdoor use. That does not mean that you cant use it inside, just that there are some steps you will need to take to make sure you install your Camp Chef oven safely.
How To Install A Camp Chef Oven In Your Campervan
The two main safety steps you should take when using a Camp Chef portable oven inside your campervan are propane detection and mitigation of heat transfer.
Have A Propane Detector
Propane is the easier of the two parts of using a Camp Chef oven in your campervan or bus conversion. We highly recommend having a hardwired propane detector in your campervan. While a battery-powered propane detector will work, there is a risk of having the batteries die and not having spares on hand to replace them. There is a smaller risk of having your detector offline with a hardwired propane detector wired into your campervan electrical system.
It is essential not to forget to test your propane detector. We like to test our detector every time we refill our onboard propane. We spray a can of compressed air that we hold upside down at our detector to test it. One short burst should be enough to set off the alarm.
Just having a hardwired propane detector is not enough. Heat mitigation is the other part of using a portable oven inside your campervan. Heat mitigation is so necessary because you do not want any excess heat entering the wood surrounding the oven. The heat build-up will dry out the surrounding wood and create a fire risk over time.
The propane detector we use:
- Hardwired Propane Detector
Heat Mitigation
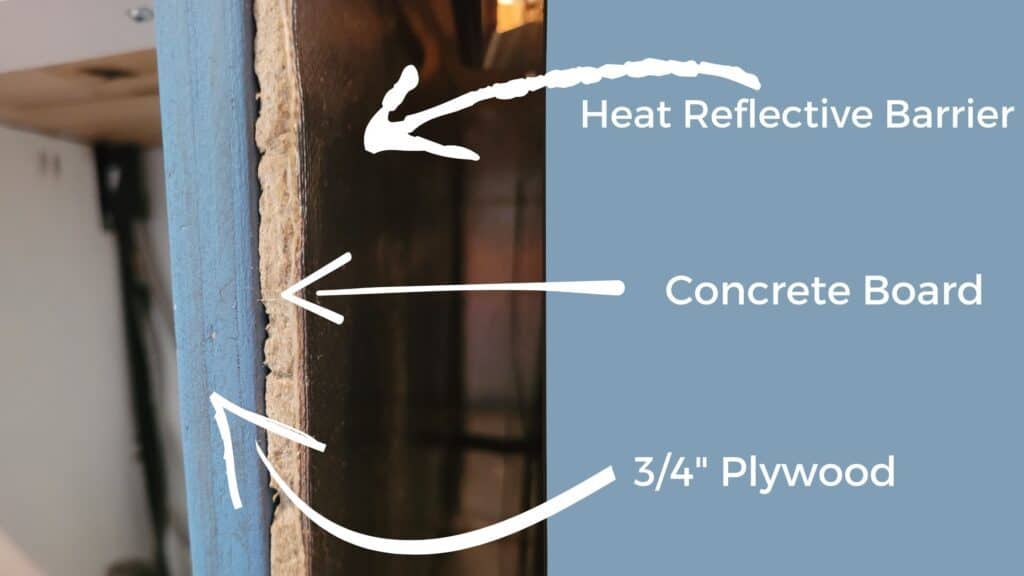
We recommend a two-step approach to heat mitigation. You want to prevent oven heat from affecting the surrounding wood, but you also want to have a fire barrier so that if there are ever any issues that lead to a fire, any flames will be contained and are easy to extinguish.
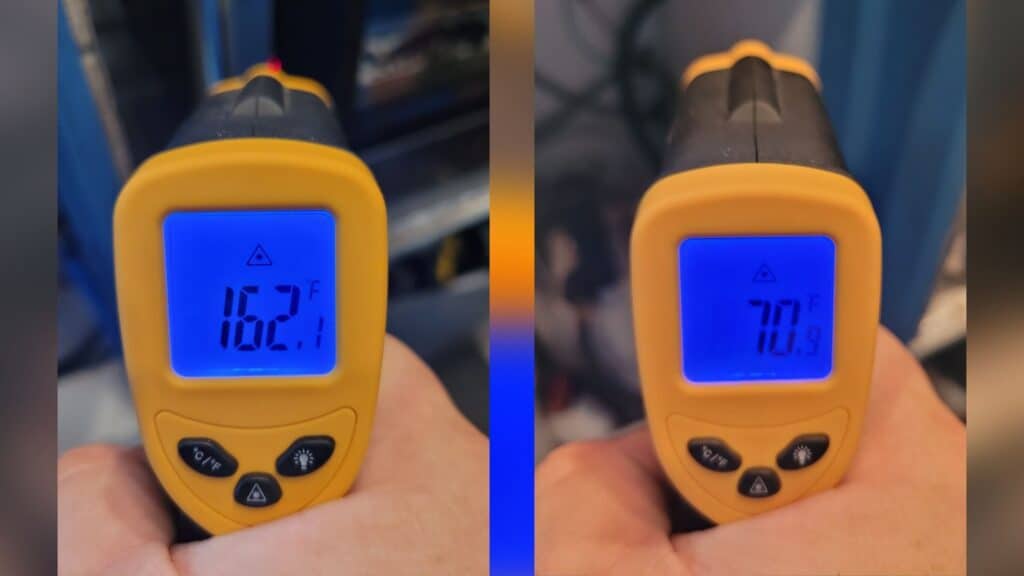
We use a base layer of concrete board to act as a fire barrier, with a reflective heat barrier glued on top of the concrete board. We have zero heat transfer to the surrounding wood with this approach, even after baking in our oven for over an hour.
Materials List:
TL;DR
- You can bake right on your stovetop using a cast iron pan.
- Solar ovens are a great alternative campervan oven.
- If you want a larger campervan oven, you can install an RV oven in your van.
- The Camp Chef portable oven is our favorite campervan oven. We have even used it in two builds now.
- If you are using a propane oven, make sure to have a reliable propane detector near your stove.
- Heat mitigation for built-in ovens is important. Use a combination of concrete board and a reflective heat barrier.
